
Project Overview
As a cybersecurity enthusiast, I decided to create my own homelab last year. There i can test different blue team tools and techniques. One of the main challenges I faced was how to collect and analyze logs from different sources within my homelab. After testing different SIEM options, I decided to stick to Graylog due to its modern UI and built-in features. My homelab consists of an old PC running Proxmox with several virtual machines (VMs) that are connected via a virtual private network. As for the firewall, I stick to the Proxmox built-in firewall. Unfortunately, there was no easy way to export its logs to Graylog. To address this issue, I decided to use Filebeat and Graylog Sidecars to collect and send firewall logs to Graylog. Here’s a step-by-step guide on how I did it.
Setup
You will need a Proxmox instance which powers a virtual machine running Graylog. Make sure that both the Proxmox and Graylog are able to communicate with each other, otherwise the following steps will not work.
Sidecars and Filebeat
 https://go2docs.graylog.org/5-0/getting_in_log_data/graylog_sidecar.html
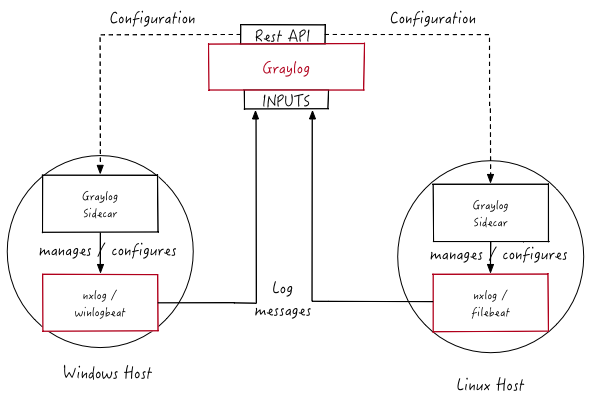
Graylog Sidecars are lightweight agents that can be used to manage log collectors and data forwarding. They are designed to work with various types of log collectors, including Filebeat. Filebeat is a lightweight data shipper, which can be used to collect, parse, and forward log data to a centralized log management system like Graylog. The Sidecar manages the API connection for Filebeat, and is responsible for configuring and starting the Filebeat service.
Configure Proxmox Firewall
I decided to only log requests that target my Proxmox instance. Otherwise it would be to much data to store on my little server. For that you have to activate firewall first, because it is turned off by default. To activate the Proxmox firewall for the datacenter, follow these steps:
- Log in to the Proxmox VE web interface.
- Click on the “Datacenter” item in the left-hand menu.
- Click on the “Firewall” tab.
Add the following rule to prevent loosing access to your web interface.
![Proxmox add rule ui]()
- Select the submenu options right next to the “Firewall” tab.
- Check the “Enable firewall” checkbox.
- Click on the “OK” button to save your changes.

Create a shell connection the your pve using the Proxmox VE web interface. If everything worked the file /var/log/pve-firewall.log should exists and contain some firewall requests. For more informations about the Proxmox firewall check out the amazing tutorial from Learn Linux TV.
Generate a Graylog API token
The API token is required for the Sidecars to authenticate with the graylog instance. If you do not already have one, you can generate one like this:
- Visit http://<graylog-hostname>/system/sidecars.
- Click on the link
Create or reuse a token for the graylog-sidecar userwhich will redirect you to the token creation page. - Enter a custom token name and create it. In the following tutorial, I used the name filebeat.
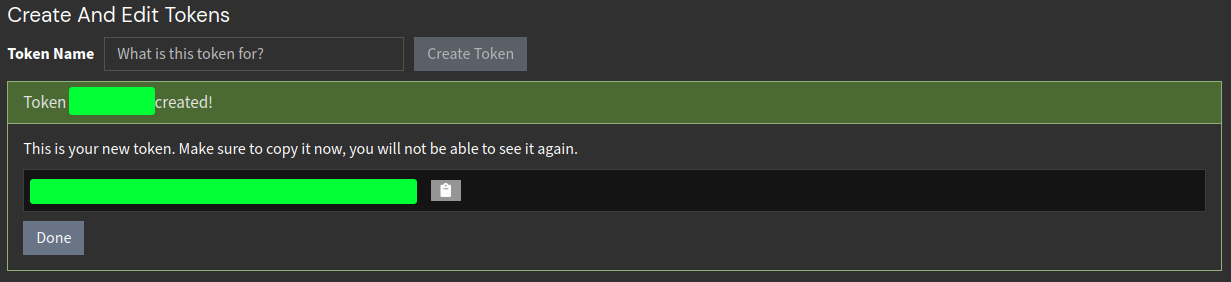
Copy your generated token from the following output and save it somewhere. You will not be able to see it again.
![token output]()
Install the Graylog Sidecar
As mentioned before the Sidecar manages the API connection for Filebeat. To install both components, connect to your Proxmox instance. Remember, we activated the firewall, so if SSH does not work, the web terminal will.
Install the Graylog Sidecar
1
2
3
 wget https://packages.graylog2.org/repo/packages/graylog-sidecar-repository_1-5_all.deb
 sudo dpkg -i graylog-sidecar-repository_1-5_all.deb
 sudo apt-get update && sudo apt-get install graylog-sidecar
Change the following lines inside the Sidecar configuration file
1
2
3
4
5
6
 # The URL to the Graylog server API.
 server_url: "http://<ip>:9000/api/"

 # The API token to use to authenticate against the Graylog server API.
 # This field is mandatory
 server_api_token: "<token>"
Generate the systemd service.
1
2
3
 sudo graylog-sidecar -service install
 sudo systemctl enable graylog-sidecar
 sudo systemctl start graylog-sidecar
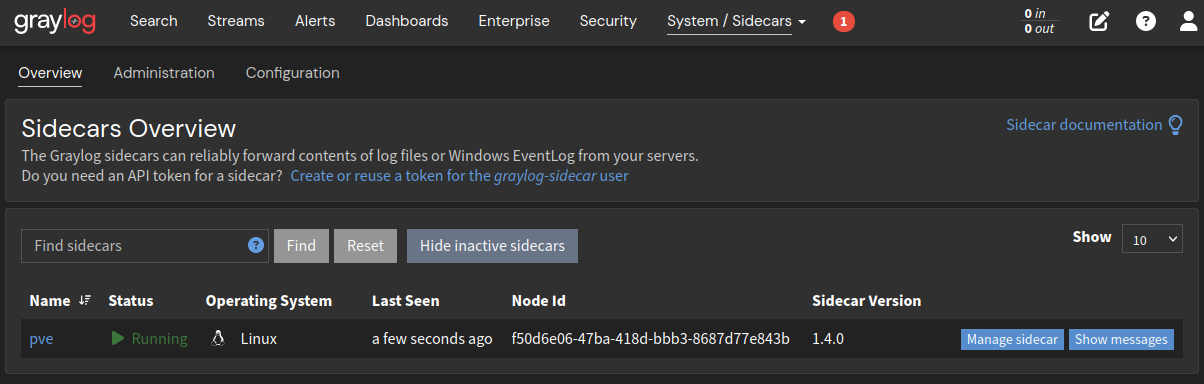
If everything has worked the sidecar should appear here:
![sidecar overview]()
Installing Filebeat
Filebeat must also be installed on the Proxmox instance.
Download .deb file from the Filebeat homepage.
1
 wget https://artifacts.elastic.co/downloads/beats/filebeat/filebeat-8.6.2-amd64.deb
Install Filebeat on the system.
1
 sudo dpkg -i filebeat-8.6.2-amd64.deb
Tell Graylog to listen for Filebeat data
Defining the input after starting the Filebeat instance would result in a lot of connection errors.
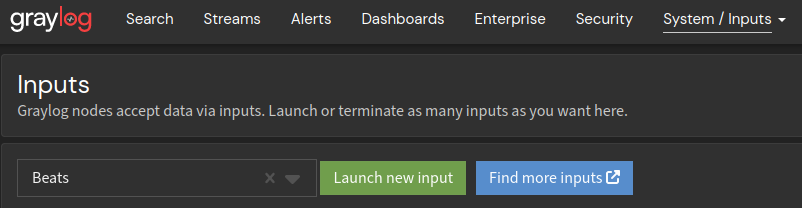
Graylog Inputs serve as the entry point for collecting and processing log data from various sources. It offers a wide range of input types, each designed to handle different log formats and protocols. In our case we need to choose Beat as the input type.
- Visit http://<graylog-hostname>/system/inputs.
- Create a new input.
![graylog add input beat]()
- Create new input confguration.
![graylog edit beat config]()
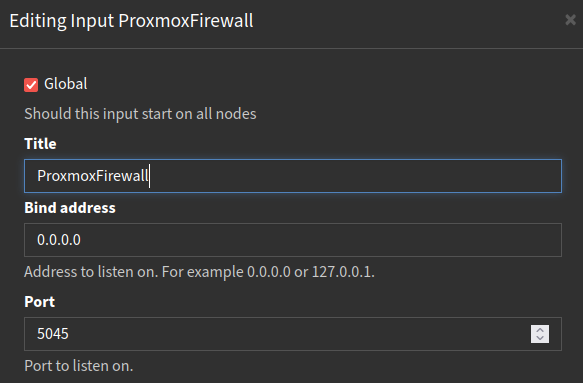
Configure Filebeat using the Graylog Interface
- Visit http://<graylog-hostname>/system/sidecars.
- Click on
Manage sidecaras shown in the image below.![graylog manage sidecar]()
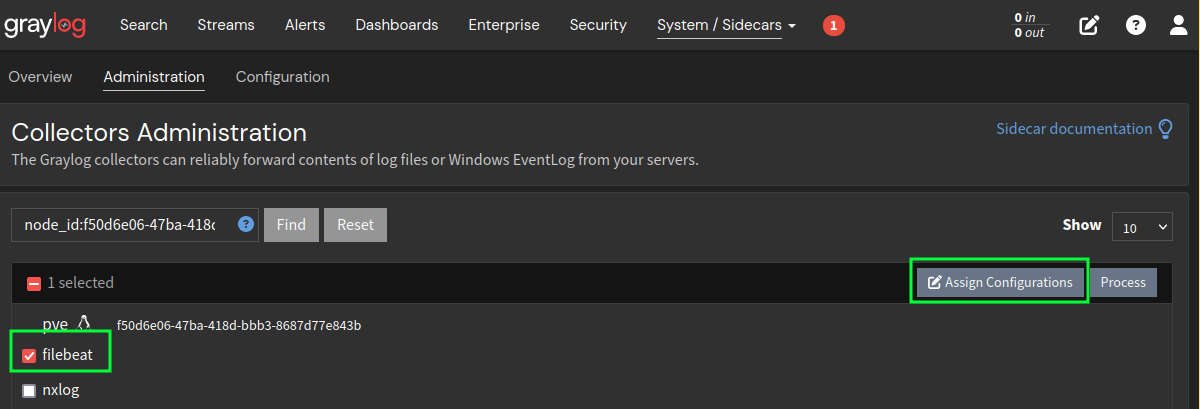
- Select
filebeatin the list and clickAssign Configurations.![graylog manage sidecar]()
- Choose
Add a new configuration. - Now choose a name for your configuration. I decided to stick to the name
Linux-Proxmox-Firewall. Your configuration should look something like this:![graylog manage sidecar]()
Copy the following yaml code inside the configuration text field. Don’t forget to change the
proxmox-server-ip.1 2 3 4 5 6 7 8 9 10 11 12 13 14 15
# Needed for Graylog fields_under_root: true fields.collector_node_id: ${sidecar.nodeName} fields.gl2_source_collector: ${sidecar.nodeId} filebeat.inputs: - input_type: log paths: - /var/log/pve-firewall.log type: log output.logstash: hosts: ["<proxmox-server-ip>:5045"] path: data: ${sidecar.spoolDir!"/var/lib/graylog-sidecar/collectors/filebeat"}/data logs: ${sidecar.spoolDir!"/var/lib/graylog-sidecar/collectors/filebeat"}/log
- Press
Update configurationto save and exit. The Filebeat service should be started automatically. If this is not the case you can check it usingsystemctl.


Conclusion
The Proxmox firewall logs should now appear under the search tab. The logs are not divided into valid fields to search through. All the firewall log data is parsed within the message attribute. To divide these further Graylog piplines are needed. This will be covered in a future blog post.